How Granite Countertops Are Fabricated in Dallas: Step-by-Step Guide | Dallas Granite Installers

How Granite Countertops Are Fabricated: A Step-by-Step Process
Granite countertops don’t become durable, seamless, and visually refined by accident. Every finished surface is the result of a highly controlled fabrication process that transforms raw stone into a custom-fit installation. While installation is what homeowners see, fabrication is where precision, longevity, and visual balance are truly created.
Understanding how granite countertops are fabricated helps homeowners make better decisions, set realistic expectations, and choose the right fabricator—especially in a competitive market like Dallas, where craftsmanship and consistency matter.
This step-by-step breakdown explains exactly how granite moves from slab to finished countertop.
Step 1: Granite Slab Inspection and Approval
Fabrication begins with slab evaluation. Even slabs from the same quarry can vary in thickness, veining, and structural integrity. Before any cutting occurs, fabricators inspect each slab for:
•Natural fissures or weak points
•Consistent thickness across the slab
•Color uniformity and mineral distribution
•Vein direction and movement
This inspection determines whether the slab is suitable for large spans, islands, or areas requiring cutouts. Approval at this stage prevents structural issues later in the process.
Step 2: Digital Templating of the Space
Once cabinets are installed and appliances are finalized, digital templating captures exact measurements of the space. This step replaces manual measuring and eliminates most human error.
Digital templating records:
•Cabinet perimeter dimensions
•Sink and cooktop locations
•Wall angles and out-of-square areas
•Overhang requirements
The result is a digital model that guides every cut, seam, and edge profile. Precision here dictates how well the countertop fits during installation.
Step 3: Slab Layout and Seam Planning
Before cutting begins, fabricators map the digital template onto the physical slab. This layout phase determines:
•Seam placement and visibility
•Vein alignment across sections
•Optimal use of the slab to minimize waste
Proper seam planning ensures seams are placed in structurally sound, visually discreet locations—never in high-stress or high-visibility areas unless unavoidable.
Step 4: Cutting Granite Slabs to Shape
Granite is cut using water-cooled CNC saws or bridge saws designed specifically for natural stone. Water cooling is essential—it controls heat, reduces dust, and protects the stone from micro-fractures.
During cutting, fabricators account for:
•Template accuracy
•Stress distribution within the slab
•Edge profile allowances
•Reinforcement locations
This stage transforms the slab into countertop sections that mirror the exact dimensions of the space.
Step 5: Sink, Cooktop, and Appliance Cutouts
Cutouts are among the most technically demanding steps in granite fabrication. Areas around sinks and cooktops experience the most stress and require precise reinforcement.
Professional fabricators:
•Smooth and polish cutout edges
•Reinforce weak areas with rods or supports
•Verify clearances for appliances
Under-mount sinks, in particular, require exact fabrication to prevent cracking or separation over time.
Step 6: Edge Profiling and Shaping
Edge profiles are shaped after cutting and cutouts are complete. This ensures consistency across all countertop sections.
Common profiles include:
•Eased edges for clean, modern spaces
•Beveled edges for subtle definition
•Bullnose edges for family-friendly kitchens
•Ogee edges for decorative applications
Each profile requires specific tooling and polishing stages. Fabrication quality at this step affects both durability and safety.
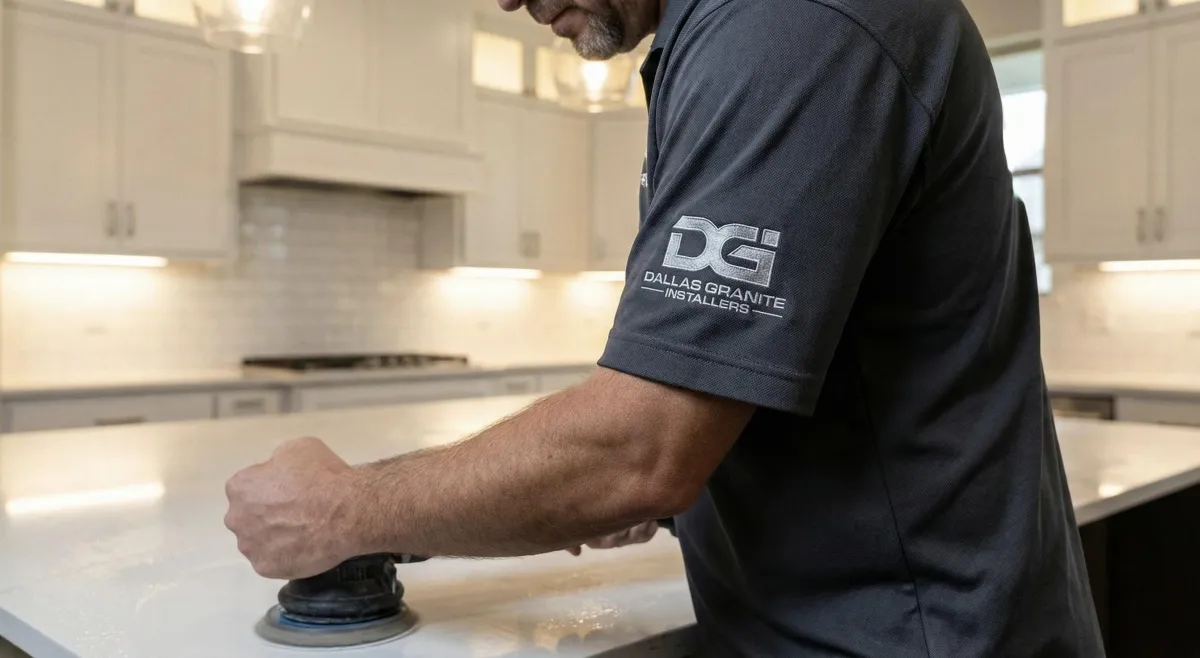
Step 7: Surface Polishing and Finishing
Polishing enhances granite’s natural color depth while improving stain resistance. Fabricators use progressive abrasives, gradually refining the surface until the desired finish is achieved.
Available finishes include:
•Polished: Glossy, reflective, and easy to clean
•Honed: Matte, understated, and contemporary
•Leathered: Textured with natural depth
The chosen finish affects how the stone interacts with light and how it performs in daily use.
Step 8: Seam Preparation and Reinforcement
Seams are prepared in the fabrication shop, not on-site. Fabricators ensure:
•Flat seam edges
•Color-matched seam alignment
•Structural reinforcement beneath seams
Proper seam preparation prevents visible gaps, uneven surfaces, and long-term separation.
Step 9: Dry Fit and Quality Inspection
Before granite leaves the shop, pieces are dry-fit to verify:
•Accurate dimensions
•Seam alignment
•Edge consistency
•Overall surface integrity
This inspection allows fabricators to correct issues before installation day, ensuring a smoother on-site process.
Step 10: Transport and Installation Readiness
Fabricated granite is carefully braced and transported to prevent vibration damage. When fabrication is done correctly, installation becomes a controlled placement process rather than a series of adjustments.
Well-fabricated countertops install faster, fit better, and perform longer.

Conclusion
Most countertop failures originate during fabrication, not installation. Cracks, seam separation, and misalignment are almost always the result of poor planning or rushed shop work.
Professional fabrication ensures:
•Structural stability
•Visual continuity
•Long-term durability
•Minimal maintenance issues
In Dallas homes, where kitchens and bathrooms see heavy daily use, fabrication quality is a long-term investment.